We had a great time celebrating the kids Birthdays this summer and I thought I would share a bit of our family fun with you. They were really hoping for Pokemon Cakes, and I have to say it was a bit nerve racking given I have never worked with fondant other than to place squares/pixels on Xander's Minecraft Cake last year. I found both designs for our cakes on Pinterest. Have I mentioned how much I love Pinterest!!


This is simple hemp twine that I found at Walmart to string the banner.


Kyogre
& Piplup

I covered the tops of both cakes with white fondant and iced the sides white. I used a simple star tip to fill the gap at the base of the cakes.
I used rice crispe and shaped it into a sort of whale shape and covered it with pre-made blue fondant. I also bought light blue, white and chocolate fondant. I made the yellow by kneading in some yellow colorant. It was not easy to knead in the color so honestly unless I needed a small amount like this again I would try to buy it. I may also try to to make it from scratch. The red piping was done with a pre-made red icing tube. I bought all of our fondant at Micheal's Crafts.
Piplup was easier because it was all on a flat surface. I used a dinner plate to create the rounded blue head and a large circular cutter for cuts above the eyes. I used a smaller metal circular cutter that I pressed to make an oval for the eyes. The little flowers and circles were also
made with cookie cutters. I molded the beak like play dough.

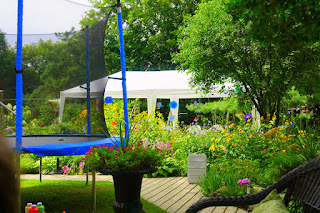
This year we had lots of outdoor play! We had a market/cafe setup outside, play dough station, bubbles in addition to the regular backyard play kind of stuff.


The cakes were greatly enjoyed with much love..

This is a fun project I wanted to
share with you all!
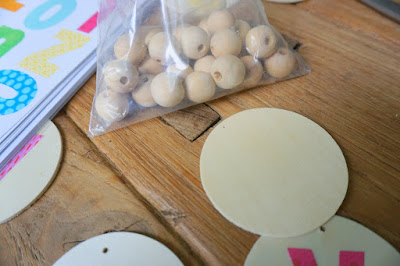
This is a super simple birthday banner I created for our fireplace mantle. I really wanted something personal that could be used year after year.

I found these fantastic letter stickers and wooden disks at Micheal's Crafts.

My husband drilled out the tops of the disks for me.

I bought a bag of large wooden beads to create a closure at the top of each letter disk.


I had fun making this! I did separate the words a bit more since this photo, and we all love it!

Happiest of Birthdays and planning to you!


You did awesome with those cakes! We always buy ours - so much easier for us, lol!
ReplyDeleteThank you Emma!!! It was a bit scary I must admit but it worked out ok and the kids really loved them :) The kids birthday party is usually never on the day so we do purchase a small cake for both to celebrate with family in between :)
Delete